This guide details designing timber sleeper retaining walls, covering hardwood properties, installation, maintenance, and trends. It addresses common challenges and offers expert insights for successful construction.
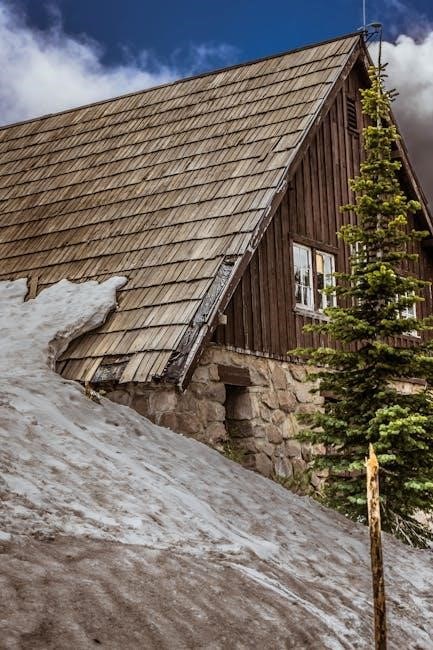
Timber sleeper retaining walls are a popular landscaping choice, offering a blend of aesthetic appeal and functional earth retention. These walls utilize horizontal timbers, known as sleepers, stacked and secured to create a robust structure. They are particularly well-suited for residential gardens, raised garden beds, and managing sloped terrains.
Historically, railway sleepers were commonly used, but today, purpose-made timber sleepers, often H4 treated hardwood, are preferred for their durability and consistency. Proper design and construction are crucial for ensuring the wall’s stability, longevity, and resistance to environmental factors; This introduction sets the stage for a comprehensive guide, exploring all facets of timber sleeper retaining wall design and implementation.
Advantages of Using Timber Sleepers
Timber sleepers offer several benefits over other retaining wall materials like concrete. They are often more cost-effective, particularly for smaller projects, and provide a natural, aesthetically pleasing appearance that blends well with garden environments. Installation is generally simpler, requiring less heavy machinery and specialized skills compared to concrete block walls.
Timber’s flexibility allows for curves and irregular shapes, offering design versatility. H4 treated hardwood provides excellent resistance to rot, decay, and insect infestation, ensuring a long lifespan. Furthermore, timber is a renewable resource, making it a more sustainable choice when sourced responsibly, with FSC or PEFC certification.
Disadvantages of Using Timber Sleepers
Despite their advantages, timber sleepers have drawbacks. They possess a shorter lifespan than concrete or stone, requiring periodic maintenance and potential replacement. Timber is susceptible to rot and insect damage, even with H4 treatment, particularly in consistently damp conditions. Wall height is limited; taller walls necessitate substantial reinforcement and may not be practical with timber alone.
Timber can be more labor-intensive to install correctly, demanding precise leveling and secure fastening. The cost can escalate with the need for additional support posts and drainage systems. Environmental concerns arise if timber isn’t sustainably sourced, highlighting the importance of FSC or PEFC certification.

Design Considerations
Careful planning is crucial. Assess site conditions, analyze soil stability, and determine appropriate drainage. Wall height dictates design complexity, influencing stability and material choices for a lasting structure.

Site Assessment and Soil Analysis
A thorough site assessment is the foundation of a successful timber sleeper retaining wall. Begin by carefully evaluating the slope’s angle and existing ground conditions. Detailed soil analysis is paramount; determine soil type, bearing capacity, and drainage characteristics. Understanding soil composition – whether it’s clay, sand, or loam – directly impacts wall stability and drainage requirements.
Identify potential issues like groundwater levels or nearby structures that could be affected. Consider the impact of surcharge loads, such as vehicles or buildings, near the wall. Accurate assessment informs proper wall height, sleeper dimensions, and the necessity for additional support like vertical posts. Ignoring these factors can lead to costly failures and compromise the wall’s longevity.
Wall Height and Slope Stability
Wall height significantly influences stability; taller walls demand more robust design and construction. Generally, timber sleeper walls are best suited for heights under 1.2 meters, though engineering input is crucial for exceeding this. Slope stability is paramount, requiring assessment of potential landslides or soil erosion. Ensure the base of the wall is firmly embedded and adequately supported to prevent forward movement.
Increasing sleeper thickness by 25mm can improve stability by up to 30%. Vertical retaining posts are essential for taller walls or unstable slopes, providing crucial support. Proper backfilling and compaction are vital to counteract lateral earth pressure. Careful consideration of these factors ensures a safe and long-lasting retaining wall.
Drainage Requirements
Effective drainage is critical for timber sleeper retaining wall longevity, preventing hydrostatic pressure buildup that can cause failure. Post holes should incorporate 100mm of coarse gravel to facilitate drainage beneath the wall. Weep holes, strategically placed throughout the wall’s structure, allow water to escape, relieving pressure. Consider installing drainage pipes behind the wall, wrapped in geotextile fabric, to channel water away.
Poor drainage leads to timber rot and structural instability. A gravel drainage layer behind the sleepers further enhances water flow. Ensure the ground slopes away from the wall to promote surface runoff. Regularly inspect weep holes for blockages and maintain clear drainage pathways.
Material Selection
Choosing the right materials is key. H4 hardwood sleepers are preferred for durability. Consider sleeper dimensions and thickness alongside Timberlok screws for secure fastening and optimal wall construction.
Types of Timber Sleepers (H4 Hardwood)
H4 hardwood is the industry standard for timber sleeper retaining walls due to its exceptional resistance to decay and insect attack. This treatment process involves pressure-impregnating the timber with preservatives, ensuring longevity even in direct contact with the ground.
Different hardwood species are utilized, each offering varying levels of strength and durability. Common choices include ironbark, spotted gum, and tallowwood. The ‘H4’ designation signifies the timber’s ability to withstand harsh environmental conditions, making it suitable for ground contact applications.
Selecting H4 hardwood ensures a robust and long-lasting retaining wall, minimizing the need for frequent repairs or replacements. Consider the aesthetic appeal of different hardwood species to complement your landscape design. Always verify the timber is certified by reputable organizations like the FSC or PEFC.
Sleeper Dimensions and Thickness
Sleeper dimensions significantly impact the wall’s stability and overall cost. Common lengths range from 2.4 to 3.6 meters, while widths typically fall between 200mm and 300mm. Thickness is a critical factor; standard sizes are 50mm, 75mm, and 100mm.
Increasing sleeper thickness by 25mm can reportedly improve wall stability by up to 30%, as highlighted by a University of Western Australia study. For taller walls, thicker sleepers are essential to resist lateral earth pressure. Consider the soil type when determining appropriate dimensions.

Proper sleeper selection balances structural requirements with budgetary constraints. Ensure sleepers are adequately supported at regular intervals, typically no more than 1200mm apart, regardless of thickness. Consult a structural engineer for complex designs or challenging site conditions.
Timberlok Sleeper Screws & Fasteners
Timberlok sleeper screws are specifically designed for securely fastening timber sleepers, offering superior holding power compared to traditional methods. These self-tapping screws eliminate the need for pre-drilling in most applications, significantly speeding up installation; They are engineered to withstand the stresses associated with retaining wall construction.
When using vertical retaining posts for added support, Timberlok screws are ideal for attaching sleepers to the posts. Ensure screws are appropriately sized for the sleeper thickness and post material. Galvanized or stainless steel screws are recommended for corrosion resistance.
Proper screw placement is crucial for wall stability; follow manufacturer’s guidelines for spacing and depth. Avoid over-tightening, which can strip the screw or damage the timber. Regularly inspect screws for signs of corrosion or loosening.
Construction Process
Building involves careful excavation, foundation preparation, sleeper placement, leveling, and post installation. Backfilling and compaction are vital for stability, ensuring proper drainage and long-term wall performance.
Excavation and Foundation Preparation
Proper excavation is crucial for a stable retaining wall. Begin by marking the wall’s intended location and excavate to the required depth, considering the wall’s height and soil conditions. Ensure the base is level and compacted to provide a solid foundation.
Post holes should be dug at regular intervals, typically no more than 1200mm apart, to accommodate vertical support posts. These holes require a base of 100mm coarse gravel for effective drainage, preventing water buildup behind the wall. The gravel layer aids in managing water pressure and maintaining structural integrity.
Carefully prepare the foundation by adding a layer of compacted gravel or crushed stone, ensuring a level surface for sleeper placement. This base improves drainage and distributes the wall’s load evenly, minimizing settling and potential movement over time.
Sleeper Placement and Leveling
Begin placing sleepers on the prepared foundation, ensuring they are securely positioned over the support posts. Accurate leveling is paramount for a visually appealing and structurally sound wall. Use a spirit level to check each sleeper’s horizontal alignment, making adjustments as needed with shims or additional gravel.
Fasten the sleepers to the posts using Timberlok sleeper screws, ensuring a tight and durable connection. Stagger the joints between sleepers in each successive layer to enhance the wall’s overall strength and stability. This interlocking pattern distributes loads more effectively.
Continuously check for level and plumb as you build upwards, correcting any deviations promptly. Proper sleeper placement and leveling are fundamental to the wall’s long-term performance and resistance to leaning or movement.
Post Installation and Support
Vertical retaining posts are crucial for supporting sleeper walls, especially those exceeding lower heights. Dig post holes to the appropriate depth, ensuring they extend below the frost line for stability. Fill the base of each hole with 100mm of coarse gravel to facilitate drainage and prevent water accumulation around the posts.
Position the posts plumb and secure them with concrete, allowing sufficient curing time before proceeding. Posts should be placed in front of the sleepers for optimal support. Ensure posts are adequately spaced, adhering to the maximum 1200mm interval rule, to prevent sleeper deflection.
Proper post installation provides essential structural reinforcement, minimizing the risk of wall lean or failure;
Backfilling and Compaction
Backfilling is a critical step following sleeper placement and post installation. Use granular material, like gravel or crushed stone, in layers no more than 200mm thick. Compact each layer thoroughly using a plate compactor to achieve optimal density and stability. Proper compaction minimizes settling and prevents undue stress on the wall structure.
Ensure adequate drainage behind the wall by avoiding fine soils that can impede water flow. Slope the backfill slightly away from the wall to further encourage water runoff. Avoid damaging the sleepers during compaction; use caution and appropriate equipment.
Well-compacted backfill is essential for long-term wall performance and longevity.
Structural Stability
Maintaining stability requires end support and intervals of 1200mm maximum. Increasing sleeper thickness by 25mm improves stability by 30%. Vertical posts offer additional support.
Importance of End Support and Intervals (1200mm Maximum)
Ensuring structural integrity begins with proper support. Timber sleepers must be supported at both ends and, crucially, at maximum intervals of 1200mm. This prevents bowing, shifting, and potential wall failure. Posts should be strategically placed in front of the sleepers to maximize support and counteract earth pressure.
Without adequate support, sleepers can become unstable, especially when retaining significant amounts of soil. Consistent intervals distribute the load evenly, minimizing stress points. Exceeding the 1200mm limit compromises the wall’s ability to withstand pressure and increases the risk of leaning or collapse. Proper post placement and secure fastening are paramount for long-term stability.
Increasing Sleeper Thickness for Stability (25mm Increase = 30% Improvement)
Sleeper thickness directly impacts a retaining wall’s resistance to bending and earth pressure. A University of Western Australia study demonstrated a significant correlation: increasing sleeper thickness by just 25mm can improve overall wall stability by up to 30%. This seemingly small adjustment dramatically enhances the structure’s load-bearing capacity.
Thicker sleepers exhibit greater rigidity, reducing deflection and minimizing the risk of wall movement. While costlier upfront, this approach can prevent future repairs and ensure long-term durability; Consider increasing thickness, particularly for taller walls or those retaining heavier soils, as a proactive measure to bolster structural integrity and longevity.
Vertical Retaining Posts for Additional Support
For walls prone to leaning or requiring extra reinforcement, incorporating vertical retaining posts is crucial. These posts, strategically placed along the wall’s length, act as robust anchors, preventing forward movement and distributing earth pressure more effectively. Simply concrete the posts firmly into the ground, ensuring adequate depth and stability.

Fasten the stacked sleepers securely to these posts using Timberlok sleeper screws, creating a unified and resilient structure. This method is particularly beneficial when dealing with uneven ground or challenging soil conditions. Posts placed in front of the sleepers yield optimal results, maximizing support and minimizing the risk of wall failure over time.
Drainage Systems
Effective drainage is vital for wall longevity. Utilize a gravel drainage layer within post holes, and incorporate weep holes and drainage pipes to manage water buildup.
Gravel Drainage Layer (100mm Coarse Gravel in Post Holes)
A crucial element of a durable timber sleeper retaining wall is a well-designed drainage system, and the foundation of this system lies within the post holes themselves. It is highly recommended to incorporate a 100mm layer of coarse gravel at the base of each post hole before setting the posts in concrete.
This gravel layer serves a vital purpose: it allows water to freely drain away from the backfill material and the timber sleepers, preventing hydrostatic pressure buildup. Hydrostatic pressure is a significant contributor to wall failure, causing bowing, cracking, and eventual collapse. By providing a permeable base, the gravel facilitates efficient water dispersal, extending the lifespan of the wall.
Ensure the gravel is clean and angular, promoting optimal drainage. Avoid using rounded gravel or fine materials, as these can become compacted and impede water flow. Proper gravel placement is a simple yet effective measure to safeguard the structural integrity of your timber sleeper retaining wall.
Weep Holes and Drainage Pipes
Complementing the gravel drainage layer, weep holes and drainage pipes are essential for managing water buildup behind timber sleeper retaining walls. Weep holes, typically 10-20mm in diameter, should be strategically placed along the base of the wall, spaced approximately every 1-2 meters. These holes allow accumulated water to escape, relieving hydrostatic pressure and preventing moisture-related damage to the timber.
For taller walls or areas with significant water runoff, consider incorporating perforated drainage pipes behind the sleepers. These pipes collect water and direct it to a suitable outlet, such as a stormwater drain or a designated drainage area. Ensure the pipes are sloped correctly to facilitate efficient water flow.
Properly installed weep holes and drainage pipes work synergistically with the gravel layer to create a comprehensive drainage system, safeguarding the longevity and stability of your retaining wall.

Maintenance and Longevity
Regular inspections are crucial for identifying damage, while timber treatment and preservation methods extend the wall’s lifespan. Proactive care ensures lasting stability and prevents costly repairs.
Timber Treatment and Preservation
Proper timber treatment is paramount for longevity, especially considering constant ground contact and potential moisture exposure. H4 hardwood, commonly used, undergoes a high-pressure treatment process with preservatives to resist decay, insect attack, and fungal growth.
This treatment isn’t a one-time fix; ongoing preservation is vital. Consider applying additional protective coatings, like oil-based sealants, every few years to replenish the protective barrier. These sealants help repel water and minimize cracking.
Regularly check for signs of deterioration, such as surface checking, splitting, or discoloration. Addressing minor issues promptly prevents them from escalating into major structural problems. Maintaining a well-preserved timber wall significantly extends its service life and reduces long-term maintenance costs.

Regular Inspections for Damage
Consistent inspections are crucial for identifying potential issues before they compromise the wall’s structural integrity. At least twice yearly, thoroughly examine the sleepers for signs of rot, cracking, or insect infestation. Pay close attention to areas in direct contact with the soil or exposed to prolonged moisture.
Check the fasteners – Timberlok screws – for corrosion or loosening. Ensure they remain securely embedded in the timber. Inspect the drainage systems, verifying weep holes aren’t blocked and drainage pipes are functioning correctly.
Address any observed damage immediately. Minor repairs, like replacing a single sleeper or tightening screws, can prevent more extensive and costly repairs down the line. Proactive maintenance ensures the wall remains stable and safe.
Environmental Considerations
Prioritize sustainable timber sourcing with certifications like FSC or PEFC. This ensures responsible forestry practices and minimizes the environmental impact of your retaining wall project.
FSC and Programme for the Endorsement of Forest Certification (PEFC)
Choosing timber certified by the Forest Stewardship Council (FSC) or the Programme for the Endorsement of Forest Certification (PEFC) demonstrates a commitment to responsible forestry. These organizations promote the management of forests that meet stringent environmental, social, and economic standards.
FSC certification ensures that the timber comes from forests that are managed to protect biodiversity, water resources, and the rights of local communities. PEFC provides a similar assurance, endorsing national forest certification systems. Selecting FSC or PEFC-certified sleepers helps reduce deforestation, supports sustainable practices, and minimizes the ecological footprint of your retaining wall project. It’s a conscious choice for environmentally aware builders and homeowners.
Sustainable Timber Sourcing
Prioritizing sustainable timber sourcing is crucial for minimizing the environmental impact of your retaining wall. This involves selecting timber harvested from responsibly managed forests, ensuring long-term forest health and biodiversity. Look beyond certifications like FSC and PEFC to understand the origin of the wood.
Consider locally sourced timber to reduce transportation emissions and support regional economies. Inquire about the forestry practices employed by suppliers, favoring those that prioritize reforestation and minimize waste. Choosing durable, naturally resistant timber species reduces the need for chemical treatments, further enhancing sustainability. Responsible sourcing safeguards forest ecosystems for future generations.
Common Challenges and Solutions
Addressing uneven ground, sleeper rot, and wall movement requires proactive solutions. Vertical posts, proper drainage, and Timberlok screws enhance stability and longevity.

Dealing with Uneven Ground
Uneven ground presents a significant challenge during timber sleeper retaining wall construction. Careful excavation and foundation preparation are crucial for a stable structure. Terracing may be necessary to create level courses for the sleepers, ensuring consistent support and preventing future settling.
Employing a stepped approach, where the wall height adjusts to the natural contours of the land, can minimize excavation and maintain a visually appealing aesthetic. Backfilling behind the sleepers with well-compacted granular material is essential to provide uniform support and counteract any ground irregularities. Consider using longer sleepers to span across minor variations in elevation, reducing the need for extensive leveling.
Thorough soil analysis will help determine the load-bearing capacity of the ground and inform the design of a suitable foundation. Proper drainage is also vital to prevent water buildup, which can exacerbate issues caused by uneven ground.
Preventing Sleeper Rot
Sleeper rot is a primary concern for longevity, demanding proactive preventative measures. Utilizing H4 hardwood sleepers, pressure-treated for superior resistance to decay and insect attack, is fundamental. Ensure proper drainage is established; stagnant water accelerates rot. Gravel layers behind the wall and weep holes facilitate water flow.
Elevate sleepers off the ground using a gravel base or concrete footings to minimize contact with moisture. Regular timber treatment with preservatives can extend lifespan, though reapplication is necessary. Avoid direct soil contact by using a barrier membrane.
Inspect periodically for signs of decay – softness, discoloration, or fungal growth – addressing issues promptly. Good ventilation around the wall also helps prevent moisture buildup and rot.
Addressing Wall Lean or Movement
Wall lean or movement signals potential instability, requiring immediate attention. Insufficient end support or inadequate post spacing are common causes. Adding vertical retaining posts concreted into the ground, and securely fastened to the sleepers with Timberlok screws, provides crucial support. Ensure posts are positioned in front of the sleepers for optimal results.
Check foundation stability; settling ground can induce movement. Improve drainage to reduce hydrostatic pressure. Increasing sleeper thickness – a 25mm increase yields up to a 30% stability improvement – can counteract minor lean. Re-leveling may be necessary, adjusting backfill and compaction.
Monitor the wall closely after corrective actions, observing for further movement.
Comments