AeroGarden Sprout Manual: A Comprehensive Guide
Welcome! This manual provides detailed instructions for your AeroGarden Sprout, enabling fresh herbs and vegetables indoors, regardless of space or season.
Discover how easy it is to grow with hydroponics, from initial setup to harvesting, ensuring a bountiful and flavorful yield consistently.
The AeroGarden Sprout is a compact, user-friendly hydroponic system designed for effortless indoor gardening. Perfect for beginners, it brings the joy of fresh herbs, vegetables, and flowers directly to your countertop.
This model, as noted in reviews, utilizes biodegradable seed pods, simplifying the planting process. It’s an inexpensive and reliable option, ideal for those seeking a connection to nature within a smart home environment, even with limited space. Enjoy year-round harvests!
What is Hydroponics and Why Use It?
Hydroponics is the method of growing plants without soil, using mineral nutrient solutions in a water solvent. The AeroGarden Sprout leverages this technology for faster growth and higher yields.
Why choose hydroponics? It conserves water, eliminates soil-borne diseases, and allows for gardening regardless of outdoor conditions. It’s a smart solution, especially with rising inflation, enabling you to grow your own food efficiently and sustainably.
Unboxing and Component Overview
Your AeroGarden Sprout package includes the base, grow deck, light hood, power adapter, and a starter seed pod kit. Biodegradable seed pods, pre-seeded with various herbs or vegetables, are also included.
Carefully remove all components, ensuring no parts are missing. Familiarize yourself with each piece before proceeding to assembly. The compact design makes it ideal for countertops, offering a convenient indoor gardening experience.

Identifying the Parts of Your AeroGarden Sprout
The base houses the water reservoir and pump. The grow deck supports the seed pods. The light hood provides essential light for plant growth. Seed pods contain pre-seeded, nutrient-rich media.
The power adapter supplies electricity. Understand each part’s function; the pump circulates nutrient solution, while the light mimics sunlight. These components work together to create an optimal hydroponic environment.
Setting Up Your AeroGarden Sprout
Begin by finding a suitable location with access to a power outlet. Assemble the unit, ensuring the base is stable. Add water to the reservoir, following the fill line. Insert the grow deck securely.
Connect the power adapter. Your AeroGarden Sprout is now ready for nutrient solution and seed pods! Refer to the following sections for detailed instructions on preparing the nutrient mix and planting your seeds.

Initial Assembly Instructions
First, unpack all components and verify everything is present. Next, place the base on a level surface. Then, insert the grow deck supports into the base, ensuring they click into place securely. After that, position the grow deck onto the supports.
Finally, attach the light hood, aligning it correctly with the base. Your AeroGarden Sprout’s physical structure is now complete, ready for water, nutrients, and seed pods!
Water and Nutrient Solution Preparation
Begin by filling the reservoir with cool tap water to the “fill line” indicated inside the base. Then, add the AeroGarden liquid nutrients – typically, one capful for each gallon of water. Ensure thorough mixing for even distribution.
Avoid overfilling, and always use the recommended nutrient dosage. Proper preparation is crucial for optimal plant growth and prevents imbalances, leading to healthier, more flavorful harvests.
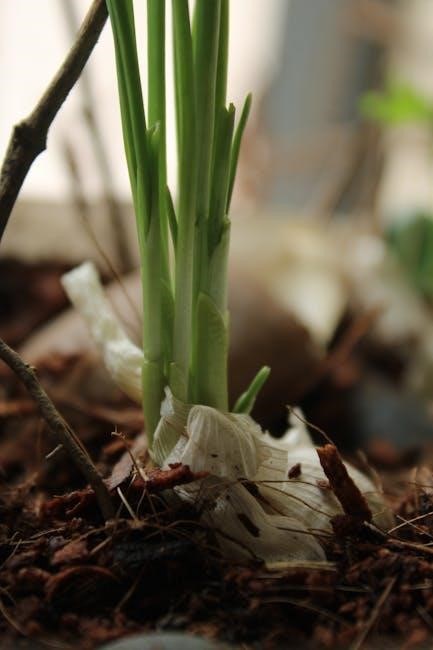
Planting Your Seed Pods
Begin by gently removing the protective covers from your AeroGarden seed pods. Then, place each pod into the designated holes in the garden’s growing tray. Ensure the label side of the pod faces outward for easy identification.
Avoid compressing the peat pellets; they should remain loose to allow root development. Proper pod placement is vital for successful germination and a thriving indoor garden.
Choosing the Right Seed Pods
Select seed pods tailored to the AeroGarden Sprout, considering your preferences and available space. Herbs like basil, parsley, and chives thrive in smaller models. For vegetables, compact varieties of lettuce and spinach are ideal.
AeroGarden brand pods offer guaranteed germination, while third-party options provide variety. Always check pod compatibility to ensure optimal growth and a bountiful harvest.
Proper Seed Pod Placement
Ensure seed pods are firmly inserted into the designated slots on the AeroGarden Sprout’s garden deck. The label side should face forward for easy identification as plants grow; Maintain even spacing between pods to allow for optimal airflow and light exposure.
Proper placement is crucial for successful germination and healthy plant development, maximizing your indoor garden’s potential.
Understanding the Control Panel
The AeroGarden Sprout’s control panel is intuitive, featuring a single button for cycling through light modes. Pressing the button adjusts the light schedule – normal, vacation, or off – catering to various plant needs. The system automatically reminds you when to add water and nutrients.
Alerts signal low water levels, ensuring optimal growing conditions and simplifying hydroponic gardening for beginners.
Light Settings and Schedules
The AeroGarden Sprout utilizes an energy-efficient LED grow light, crucial for photosynthesis. Its control panel offers three settings: normal (15 hours on, 9 hours off), vacation (12 hours on, 12 hours off), and off. Normal mode supports robust growth, while vacation mode conserves energy.
Adjusting the schedule based on plant type and growth stage maximizes yield and ensures healthy, vibrant herbs and vegetables.
Reminder System and Alerts
The AeroGarden Sprout features a helpful reminder system, prompting you for water and nutrient additions. Alerts illuminate on the control panel, ensuring timely maintenance for optimal plant health. Ignoring these prompts can lead to nutrient deficiencies or dehydration, impacting growth.
Consistent monitoring and responding to these alerts guarantees a thriving indoor garden, maximizing your harvest and simplifying the growing process.
Maintaining Your AeroGarden Sprout
Regular maintenance is crucial for a flourishing AeroGarden Sprout. Consistent water level checks and refills are essential, as plants absorb water rapidly. Nutrient solution replacements, typically every two weeks, provide vital sustenance for healthy growth.
Monitor for algae and address it promptly. Routine care ensures optimal conditions, maximizing yields and extending the lifespan of your indoor garden system.
Water Level Monitoring and Refilling
Regularly inspect the water level in your AeroGarden Sprout; plants consume water quickly, especially during initial growth stages. Maintain the water level between the “Min” and “Max” fill lines indicated inside the bowl. Only add water when necessary, avoiding overfilling.
Use fresh, room-temperature water. Consistent monitoring prevents nutrient imbalances and ensures optimal plant hydration for a thriving indoor garden.
Nutrient Solution Replacements
Replenish the nutrient solution every two weeks, or as indicated by the control panel’s reminder system. Drain the old solution completely before adding fresh nutrients and water. Follow the precise measurements on the nutrient bottle for optimal plant growth.
Consistent nutrient levels are crucial for healthy development and abundant harvests. Regular replacements prevent deficiencies and maximize your AeroGarden Sprout’s potential.
Troubleshooting Common Issues
Addressing issues promptly ensures a thriving garden. Algae growth is common; clean the reservoir regularly with a mild solution. Pest problems are rare but can occur; use insecticidal soap if needed.
Monitor plants for yellowing leaves or stunted growth, adjusting nutrient levels accordingly. Refer to the AeroGarden website for detailed solutions to specific problems, ensuring a healthy harvest.
Addressing Algae Growth
Algae thrives in light and nutrient-rich environments, common in AeroGardens. Regularly clean the reservoir and plant baskets to remove algae buildup. Ensure the garden isn’t exposed to excessive direct sunlight, which fuels algae growth.
Consider using opaque reservoirs or covers to block light. A diluted hydrogen peroxide solution can also help control algae, but use cautiously, following instructions carefully.
Dealing with Pest Problems
While less common indoors, pests like aphids or fungus gnats can occasionally affect AeroGardens. Inspect plants regularly for any signs of infestation, such as visible insects or damaged leaves.
Introduce beneficial insects like ladybugs, or use insecticidal soap, ensuring it’s safe for edible plants. Maintain good hygiene by removing any dead leaves and keeping the surrounding area clean to deter pests.
Harvesting Your Herbs and Vegetables
Enjoy the fruits (and leaves!) of your labor! Harvesting encourages continued growth. For herbs, snip leaves regularly, taking no more than 25% at a time. Vegetables, like lettuce, can be harvested leaf-by-leaf as needed, or the entire head can be cut.
Regular harvesting promotes bushier growth and a more abundant yield. Use clean scissors or shears to avoid damaging the plants, ensuring a continuous supply of fresh produce.
When to Harvest
Herbs are typically ready for harvest 4-6 weeks after planting, when they reach 6-8 inches tall. Leafy greens, such as lettuce and spinach, can be harvested in as little as 3-4 weeks, once leaves are large enough to enjoy.
Cherry tomatoes and peppers require 8-12 weeks. Observe your plants; harvest when herbs are fragrant and vegetables display vibrant color and appropriate size for consumption.
Proper Harvesting Techniques
For herbs, snip leaves from the top of the plant, encouraging bushier growth. Avoid removing more than one-third of the plant at a time. Leafy greens can be harvested by snipping outer leaves, allowing the inner leaves to continue growing.
Tomatoes and peppers should be cut from the vine with scissors or pruning shears when fully colored and slightly soft to the touch, promoting continued production.
Cleaning and Maintenance

Regularly wipe down the AeroGarden Sprout’s exterior with a damp cloth to prevent buildup. Monthly, disassemble and wash the grow deck and basket with warm, soapy water. Deep cleaning every three months involves disinfecting all parts with a diluted bleach solution.
Ensure thorough rinsing to remove all traces of bleach before reassembling. This prevents algae and maintains optimal growing conditions for healthy plants.
Regular Cleaning Schedule
Weekly, inspect the water reservoir for algae and wipe down the grow light cover. Bi-weekly, rinse the grow deck and basket to remove any debris. Monthly, perform a more thorough cleaning, disassembling and washing all removable parts with mild soap and water.
This consistent schedule prevents buildup, ensuring optimal hygiene and promoting healthy plant growth within your AeroGarden Sprout system.
Deep Cleaning Procedures
Every three months, completely disassemble your AeroGarden Sprout. Soak all parts – the reservoir, grow deck, basket, and pump – in a solution of water and white vinegar to dissolve mineral deposits. Scrub thoroughly with a soft brush, rinse completely, and allow to air dry.
This deep clean revitalizes the system, preventing clogs and ensuring peak performance for continued successful hydroponic gardening.
Extending the Life of Your AeroGarden Sprout
Maximize longevity by regularly inspecting the light panel for dust accumulation; gently wipe clean with a soft cloth. Periodically check the pump for debris, ensuring unimpeded water flow. Avoid harsh chemicals during cleaning, opting for vinegar solutions instead.
Proper care and maintenance will ensure years of bountiful harvests from your AeroGarden Sprout, providing fresh produce consistently.
Replacing Light Panels
Over time, light panels may diminish in intensity. Replacement is straightforward: disconnect the unit, carefully remove the old panel, and align the new one, ensuring secure connections. AeroGarden offers compatible replacement panels readily available for purchase online or through retailers.
Maintaining optimal light levels is crucial for healthy plant growth, guaranteeing vibrant herbs and vegetables throughout the year.
Pump Maintenance
Regular pump maintenance ensures consistent nutrient delivery. Periodically inspect the pump intake for blockages from root debris or mineral buildup. Gently clean with warm water and a soft brush; avoid harsh chemicals. AeroGarden recommends occasional pump replacement, typically every 12-18 months, depending on usage.
A functioning pump is vital for hydroponic success, promoting robust plant growth and preventing nutrient deficiencies.
Seed Pod Compatibility and Alternatives
AeroGarden offers a wide range of pre-seeded pods designed for optimal growth within the Sprout system. However, third-party seed pod options are available, offering variety. Ensure compatibility with the Sprout’s pod size and growth medium.
Consider using reusable grow sponges with your own seeds for a cost-effective and customizable gardening experience.
AeroGarden Brand Pods
AeroGarden brand seed pods are specifically formulated for their systems, guaranteeing successful germination and healthy plant development. These pods contain pre-seeded, nutrient-rich grow sponges, simplifying the planting process.
They offer a diverse selection of herbs, vegetables, and flowers, ensuring a consistent and reliable harvest. Utilizing these pods maximizes the Sprout’s potential for optimal growth.
Third-Party Seed Pod Options
Beyond AeroGarden, numerous third-party seed pod options exist, offering greater variety and potentially lower costs. However, compatibility can vary; ensure pods fit the Sprout’s pod slots securely.
Consider pod material and nutrient content, as these impact growth. While convenient, third-party pods may require adjustments to nutrient schedules for optimal results within the AeroGarden system.
Recipes Using Your AeroGarden Harvest
Unlock culinary creativity! Your AeroGarden’s fresh herbs and vegetables elevate everyday meals. Fragrant pesto, spicy chimichurri, and vibrant tabbouleh are easily achievable with homegrown ingredients.
Experiment with salads, pizzas, and grilled dishes, enjoying peak flavor and nutritional value. Utilizing your harvest reduces grocery costs and promotes a healthier, more sustainable lifestyle, enhancing your cooking.
Herb-Focused Recipes
Elevate your dishes with fresh herbs! Create classic pesto using basil, or infuse olive oil with rosemary and thyme. Mint adds a refreshing twist to cocktails and salads, while chives enhance dips and omelets.

Experiment with chimichurri for grilled meats, or add cilantro to salsas and tacos. Your AeroGarden provides a constant supply of flavorful herbs, transforming simple meals into gourmet experiences.
Vegetable-Focused Recipes
Enjoy garden-fresh vegetables year-round! Savor vibrant salads with crisp lettuce and juicy tomatoes. Roast cherry tomatoes for a sweet and intense flavor, or create a colorful stir-fry with peppers and herbs.

Add homegrown greens to sandwiches and wraps, or blend them into smoothies. Your AeroGarden’s bounty allows for creative and healthy cooking, bringing the taste of summer to every meal.
AeroGarden Sprout vs. Other AeroGarden Models
The Sprout is AeroGarden’s most compact model, ideal for limited spaces. Compared to Harvest or Bounty models, it holds fewer seed pods – typically three. While larger models offer more growing capacity and features like adjustable heights, the Sprout excels in simplicity and affordability.

It’s perfect for beginners or those wanting to grow a small selection of herbs or greens, offering a streamlined hydroponic experience.
Comparing Features and Sizes
The Sprout measures approximately 10.5” x 6” x 15”, making it incredibly space-efficient. It features a simplified control panel with basic light and reminder settings, differing from the more advanced controls on Harvest or Bounty models.
Larger units boast adjustable light hoods and more customizable timers. The Sprout’s smaller size and fewer features contribute to its lower price point, offering a great entry point into hydroponic gardening.
Where to Find Support and Resources
AeroGarden’s official website provides extensive FAQs, troubleshooting guides, and downloadable manuals for the Sprout model. Manuals.plus also hosts user guides. For community support, explore online forums and groups dedicated to AeroGardens, where users share tips and solutions.
YouTube channels offer numerous video tutorials demonstrating setup, maintenance, and harvesting techniques. These resources ensure you have ample assistance throughout your AeroGarden journey.
AeroGarden Website and FAQs
AeroGarden’s official website is the primary source for support, offering a comprehensive FAQ section addressing common issues with the Sprout. You’ll find downloadable manuals, troubleshooting guides, and detailed product information.
The website also features a contact form for direct assistance. Regularly check for updates and new resources to maximize your AeroGarden experience and ensure optimal plant growth.
Online Communities and Forums
Numerous online communities and forums are dedicated to AeroGarden enthusiasts, providing a platform to share experiences, tips, and solutions. These spaces offer valuable insights into troubleshooting, seed pod recommendations, and advanced growing techniques for your Sprout.
Engage with fellow gardeners, ask questions, and learn from their successes – a fantastic resource beyond the official AeroGarden support channels.
Comments