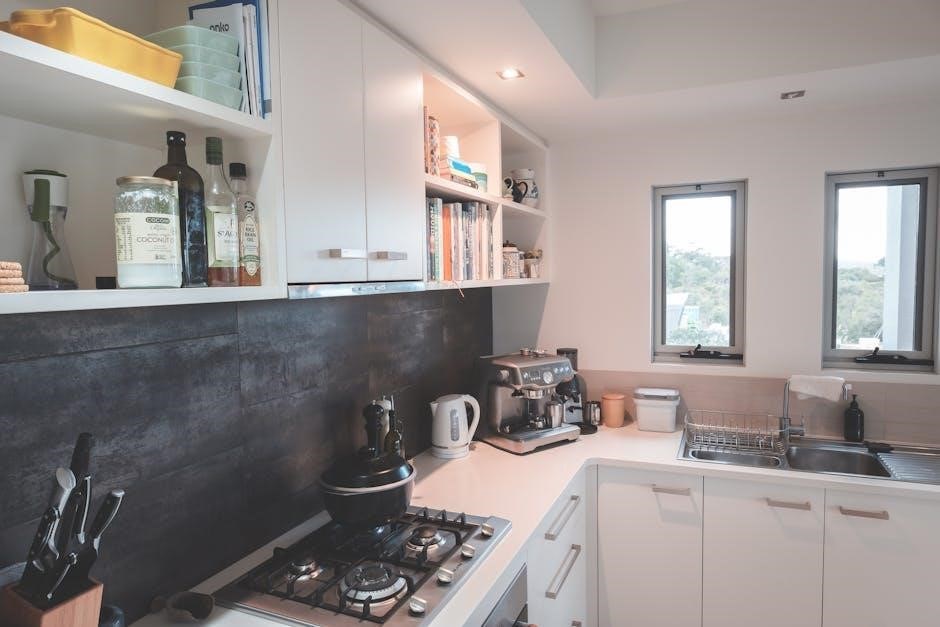
Understanding Your GE Stove’s Self-Cleaning Feature
GE ovens boast a self-clean cycle utilizing high heat—around 880°F (471°C)—to decompose food soils into ash for easy removal, simplifying oven maintenance.
This convenient feature eliminates harsh chemicals and scrubbing, ensuring your oven remains clean and functions optimally for years to come with minimal effort.
What is Self-Cleaning and How Does it Work?
Self-cleaning ovens, like those from GE, employ extremely high temperatures – approximately 880°F (471°C) – to burn off food residue. This process transforms baked-on spills and splatters into a light ash.
Unlike manual cleaning, no chemicals are needed; The intense heat effectively decomposes the soils, leaving behind only a small amount of ash that can be easily wiped away after the cycle completes and the oven cools. This automated process saves significant time and effort.
Benefits of Using the Self-Clean Cycle
Utilizing the self-clean cycle on your GE stove offers numerous advantages. It eliminates the need for abrasive oven cleaners and strenuous scrubbing, saving you valuable time and physical effort.
This feature ensures a thorough cleaning, reaching areas difficult to access manually. Furthermore, it’s a safer alternative to harsh chemicals, especially beneficial for households with children or pets, promoting a healthier kitchen environment and extending oven life.
Preparing Your GE Stove for Self-Cleaning
Proper preparation is key! Remove oven racks and any accessories before initiating the self-clean cycle, and wipe up loose debris and large spills inside the oven.
Removing Oven Racks and Accessories
Before beginning the self-clean cycle, carefully remove all oven racks, broiler pans, baking stones, and any other accessories stored inside the oven cavity. These items can become discolored or damaged from the extremely high temperatures reached during cleaning.
Removing these items ensures a more thorough cleaning process and prevents potential hazards. Refer to your GE oven’s owner’s manual for specific instructions regarding rack removal, as some models may have unique rack designs.
Wiping Up Loose Debris and Large Spills
Prior to initiating the self-clean cycle, manually wipe up any loose debris, food particles, or large spills from the oven floor. While the high heat will burn off many residues, large amounts of buildup can create excessive smoke and odors.
This simple step helps ensure a more efficient and cleaner self-cleaning process. Focus on areas with concentrated spills, as these are more likely to cause issues during the cycle.
Checking the Oven Door Seal
Before starting the self-clean cycle, carefully inspect the oven door seal (gasket) for any damage, gaps, or deterioration. A compromised seal can allow heat and smoke to escape during the high-temperature cleaning process.
Ensure the seal is intact and creates a tight closure around the oven door. If damage is detected, avoid using the self-clean function and consult a qualified technician for repair or replacement.
Initiating the Self-Clean Cycle
To begin, set the desired clean time on manual models or utilize the digital controls on electronic models, ensuring the oven door is locked.
Setting the Clean Time (Manual Models)
For manual GE stoves, initiating the self-clean cycle requires a specific procedure. First, slide the door latch handle to the right. Then, rotate the stop knob to indicate three hours after the current time of day.
Ensure the start knob aligns with the current time. Next, turn the selector dial to “clean” and the temperature dial also to “clean”. The oven will then automatically begin the cleaning process at the designated time.
Using the Digital Controls (Electronic Models)
Electronic GE stoves simplify self-cleaning through digital controls. Typically, press the “Self Clean” button on the control panel. The display will prompt you to select a clean time or cycle length, often offering options for light or heavy cleaning.
Confirm your selection, and the oven will automatically lock and begin the self-clean cycle. Refer to your owner’s manual for model-specific instructions, as button layouts and options may vary.
Understanding the Lock Feature During Cleaning
GE stoves automatically engage a locking mechanism when the self-clean cycle initiates, prioritizing safety. This prevents accidental oven door opening during the high-temperature process, protecting users from burns.
The lock remains active throughout the cycle and until the oven cools sufficiently. Do not attempt to force the door open; the lock will release automatically. This feature is crucial for safe and effective oven cleaning.

Self-Clean Cycle Duration and Factors Affecting It
Self-clean cycle durations vary; soil level, oven model, and chosen cleaning level impact time. Heavier soils and certain models require longer cycles.
Typical Self-Clean Cycle Times
GE stove self-clean cycles generally range from 2 to 4 hours, though this can fluctuate; Many models offer a 3-hour setting as a standard option for moderate cleaning needs.
Electronic models often provide more precise time adjustments, while manual versions may have fewer options. Always consult your owner’s manual for the specific duration recommended for your GE oven model. Remember, heavily soiled ovens will naturally require longer cleaning periods to achieve optimal results.
Soil Level and Cycle Length
The amount of baked-on grease and food residue significantly impacts the self-clean cycle’s duration. Lightly soiled ovens may complete a clean in around 2 hours, utilizing a lighter clean setting if available.
However, heavily soiled ovens necessitate longer cycles, potentially reaching the maximum 4-hour timeframe. Selecting a more intense clean option ensures thorough decomposition of stubborn soils, but extends the overall cleaning process.
Oven Model Variations in Cycle Time
GE oven self-clean cycle durations aren’t uniform; they vary based on the specific model. Older, manual-control models often offer a fixed 3-4 hour clean cycle, determined by the stop knob setting.
Newer, electronic models provide more flexibility, with cycle times ranging from 2 to 4 hours, and sometimes offering different clean levels. Always consult your owner’s manual for precise instructions and recommended cycle lengths for your particular GE oven.

Safety Precautions During Self-Cleaning
During the self-clean cycle, ensure adequate ventilation, keep children and pets away, and avoid oven use due to extremely high temperatures.
Ventilation Requirements
Proper ventilation is crucial during the self-clean cycle, as the process generates significant heat and potentially noticeable odors. Open windows in the kitchen or use the range hood fan to ensure sufficient airflow.
These fumes, while generally normal, can be irritating to some individuals, and good ventilation minimizes their concentration. Avoid prolonged exposure to the emitted smoke and ensure the area is well-aired throughout the cleaning process for optimal safety and comfort.
Keeping Children and Pets Away
During the self-clean cycle, the oven’s exterior surfaces become extremely hot, posing a burn risk. It is absolutely essential to keep children and pets away from the oven at all times during operation.
The locking mechanism, while a safety feature, doesn’t eliminate the hazard of external heat. Supervise the area closely and ensure no one can accidentally touch the oven’s surface until it has completely cooled down after the cycle finishes.
Avoiding Oven Use During the Cycle
Do not use the oven for cooking while the self-clean cycle is in progress; The extremely high temperatures generated during cleaning are unsuitable and unsafe for food preparation.
Attempting to use the oven concurrently could damage the appliance and potentially create a fire hazard. Wait until the cycle is fully complete and the oven has cooled down before resuming normal cooking operations, ensuring both safety and optimal performance.
What to Expect During the Self-Clean Cycle
Expect high temperatures, potential odors, and the oven door to lock automatically for safety during the self-clean cycle, a normal part of operation.
High Temperatures and Potential Odors
During the self-clean cycle, your GE oven heats to approximately 880°F (471°C) to burn off food residue. This intense heat can produce noticeable odors, which are generally normal.
These smells are a result of decomposing food particles. Some owners report a plastic-like or metallic scent, also considered typical. Ensure adequate ventilation by opening windows or using a range hood to minimize any discomfort from these temporary odors.
The Locking Mechanism and its Purpose
GE ovens feature an automatic locking mechanism that engages when the self-clean cycle begins. This crucial safety feature prevents the oven door from being opened during the high-temperature cleaning process.
The lock remains active until the oven cools down to a safe temperature. Do not attempt to force the door open; this could cause damage or injury. The locking system ensures both user safety and efficient cleaning by maintaining consistent heat.
Smoke and Fumes – What’s Normal, What’s Not
During the self-clean cycle, some smoke and odor are normal as food residue burns off at high temperatures. However, excessive smoke or a burning plastic smell is not normal.
Ensure adequate ventilation by opening windows. If heavy smoke occurs, immediately stop the cycle and consult your owner’s manual. A small amount of ash-like residue is expected, but significant fumes indicate a potential issue requiring attention.
After the Self-Clean Cycle is Complete
Allow the oven to cool completely before opening. Wipe away the resulting ash residue with a damp cloth, and reset the clock if needed.
Allowing the Oven to Cool Down
After the self-clean cycle concludes, it’s crucial to allow the oven to cool down completely before attempting to open the door. The oven reaches extremely high temperatures during cleaning, posing a burn risk.
The cooling process can take several hours, depending on the cycle duration and oven model. Avoid any contact with the oven interior until it’s cool to the touch. Patience is key to ensuring safety and preventing potential injuries;
Wiping Away Ash Residue
Once the oven has fully cooled, you’ll notice a small amount of ash residue remaining inside. This is a normal byproduct of the self-clean cycle, similar in texture to cigarette ashes.
Simply wipe away the ash with a damp cloth or sponge. Avoid using abrasive cleaners, as they could damage the oven’s interior. A final wipe-down ensures a sparkling clean oven, ready for your next culinary creation!
Resetting the Oven Clock (If Necessary)
The self-clean cycle on some GE models may reset the oven clock. If this occurs, simply reset the clock to the correct time after the cycle is complete and the oven has cooled.
Refer to your owner’s manual for specific instructions on how to reset the clock on your particular GE oven model. Maintaining accurate time ensures proper operation of timed cooking and baking functions.
Troubleshooting Common Self-Clean Issues
Common issues include error codes, failure to reach cleaning temperature, or excessive smoke/odor; consult your manual for code meanings and solutions.
Addressing these promptly ensures optimal self-cleaning performance and oven functionality.
Error Codes and Their Meanings
GE stove error codes during the self-clean cycle indicate specific problems requiring attention. A common code, “F2” or “F2 E1”, often signals a door lock issue, preventing the cycle from starting.
Other codes might relate to temperature sensor failures or control board malfunctions. Always consult your owner’s manual for a comprehensive list and corresponding troubleshooting steps. Ignoring error codes can lead to further damage or an incomplete cleaning process, potentially impacting oven performance.
Oven Not Reaching Cleaning Temperature
If your GE oven fails to reach the necessary 880°F (471°C) during the self-clean cycle, several issues could be at play. A faulty temperature sensor is a common culprit, preventing accurate heat regulation.
Additionally, a malfunctioning heating element or a problem with the oven’s control board could hinder proper heating. Check the power supply and ensure the door is securely latched, as this is crucial for initiating and maintaining the high cleaning temperature.
Excessive Smoke or Odor
Some smoke and odor during the self-clean cycle are normal, as food residue decomposes at high temperatures. However, excessive smoke or a strong, unpleasant odor indicates a problem.
This could stem from excessive grease buildup or spills that haven’t been wiped up beforehand. Ensure thorough pre-cleaning. If the smoke persists or the odor is acrid, immediately stop the cycle and ventilate the kitchen, as it may signal a more serious issue.
Maintaining Your GE Stove After Self-Cleaning
Regular wipe-downs between self-clean cycles prevent heavy soil buildup, while checking and cleaning the oven vent ensures optimal performance and safety.
Regular Wipe-Downs Between Cycles
Consistent, quick wipe-downs after each use significantly reduce the frequency needed for the intense self-clean cycle, preserving oven components and energy consumption.
Simply use a damp cloth with mild detergent to address spills and splatters promptly; this preventative approach minimizes baked-on residue, making future cleaning easier and more effective.
Focus on areas prone to messes, like the oven floor and door, to maintain a consistently cleaner interior and extend the life of your GE stove.
Preventative Measures to Reduce Soil Buildup
Minimize excessive splattering by using oven-safe cookware with lids during cooking, especially when preparing sauces or dishes prone to bubbling over.
Consider utilizing oven liners to catch drips and spills, simplifying cleanup and protecting the oven floor from direct contact with food residue.
Regularly check and tighten any loose oven seals to prevent food particles from accumulating in hard-to-reach areas, contributing to overall cleanliness.
Checking and Cleaning the Oven Vent
Regularly inspect the oven vent, typically located at the back of the oven, for any blockages caused by grease, food particles, or debris.
A blocked vent can hinder proper oven function and potentially affect the self-clean cycle’s efficiency. Use a vacuum cleaner attachment or a small brush to carefully remove any obstructions.
Ensure the vent remains clear to maintain optimal airflow and prevent potential overheating during operation and cleaning processes.
GE Stove Self-Cleaning Cycle – Model Specific Instructions
Consult your oven’s owner’s manual for tailored self-clean instructions, as procedures vary between GE models; online resources offer additional support.
Referencing Your Owner’s Manual
Your GE stove’s owner’s manual is the primary resource for self-clean instructions specific to your model; it details precise steps, recommended cycle durations, and safety precautions.
Pay close attention to model-specific details regarding rack removal, door locking mechanisms, and any unique features. The manual will also clarify error codes and troubleshooting tips. Ignoring these instructions could lead to improper cleaning or potential damage to your appliance. Always prioritize the guidance provided within your manual.
Online Resources and Support
GE Appliances offers extensive online support, including a comprehensive FAQ section and downloadable manuals for various models, aiding in self-clean cycle understanding.
Their website provides video tutorials demonstrating the process, troubleshooting guides for common issues, and a direct line to customer service for personalized assistance. Utilize GE’s support community forums to connect with other users and share experiences. These digital resources supplement your owner’s manual, ensuring a smooth cleaning process.
Understanding Different Cleaning Levels
GE ovens offer “light clean” and “heavy clean” options; light clean shortens the cycle, while heavy clean tackles significant soil buildup effectively.
Light Clean vs. Heavy Clean Options
GE stoves provide flexibility with self-clean options, catering to varying levels of oven soiling. The “light clean” setting is ideal for ovens with minimal residue, offering a shorter cycle duration—typically around two to three hours—and consuming less energy.
Conversely, the “heavy clean” option is designed for ovens with substantial baked-on food and grease. This setting extends the cycle to approximately four to five hours, employing higher temperatures to thoroughly decompose stubborn soils, ensuring a pristine clean.

The Role of WiFi Connectivity in Newer Models
Newer GE models leverage WiFi for remote monitoring and control of the self-clean cycle, offering convenience and peace of mind through smartphone integration.
Remote Monitoring and Control
WiFi-enabled GE stoves empower users with remote control over the self-clean cycle via a smartphone app. This allows initiating, pausing, or even canceling the cleaning process from anywhere with an internet connection.
The app provides real-time status updates, notifying you when the cycle begins, progresses, and completes. Furthermore, it offers convenient scheduling options, enabling you to set the self-clean to run automatically at a preferred time, enhancing convenience and flexibility.
Comments