Masterbuilt Turkey Fryer Instruction Manual: A Comprehensive Guide
Welcome to the ultimate guide for your Masterbuilt Turkey Fryer! This manual details safe operation‚ assembly‚ and delicious results‚ ensuring a perfect holiday feast․
Masterbuilt provides a versatile appliance capable of frying‚ steaming‚ and boiling‚ offering culinary flexibility beyond just turkey – explore all possibilities!
Remember‚ maximum turkey size is 20lbs‚ and assembly assistance is available at 1-800-489-1581 for a seamless experience․
Understanding Your Masterbuilt Turkey Fryer
Your Masterbuilt Turkey Fryer is a powerful kitchen appliance designed for efficient and safe cooking․ It’s more than just a fryer; newer models‚ like the 20100809 Butterball Oil-Free Electric Turkey Fryer and Roaster‚ function as steamers and boilers too‚ offering incredible versatility․
Understanding its capabilities is key to maximizing your cooking experience․ This fryer utilizes electric heating to bring oil (or operates oil-free in some models) to precise temperatures‚ ensuring evenly cooked food․ The design incorporates safety features like a shorter cord to minimize tripping hazards․
Familiarize yourself with the components – the pot‚ burner assembly‚ controls‚ and safety features․ Knowing these elements will allow you to confidently prepare a delicious and safe meal․ Remember‚ proper usage‚ as outlined in this manual‚ is crucial for optimal performance and longevity of your Masterbuilt fryer․

Safety First: Essential Precautions
Prioritizing safety is paramount when operating your Masterbuilt Turkey Fryer․ Always adhere to the warnings and important safeguards detailed in the manual․ Never use the fryer indoors or in enclosed spaces – it’s designed for outdoor use only․
Ensure the fryer is placed on a stable‚ level surface away from flammable materials․ Exercise extreme caution when handling hot oil; it can cause severe burns․ Always use appropriate safety gear‚ including oven mitts and eye protection․
Crucially‚ never leave the fryer unattended during operation․ The maximum turkey size is 20lbs (9․07kgs); exceeding this limit can be dangerous․ Disconnect the fryer from the power source when not in use and allow it to cool completely before cleaning or storing․ Remember‚ responsible operation ensures a safe and enjoyable cooking experience․
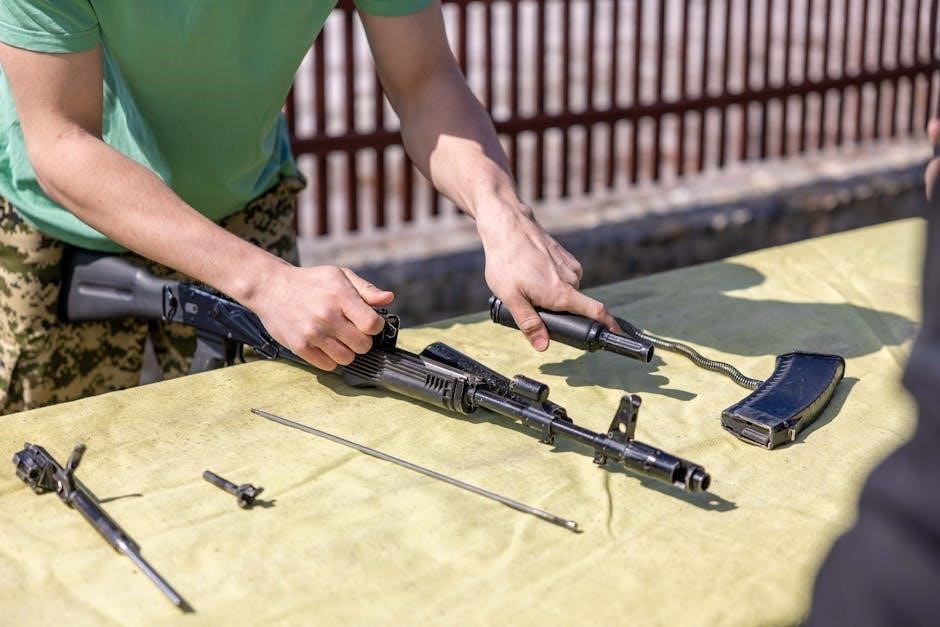
Components and Parts Identification
Familiarizing yourself with the components of your Masterbuilt Turkey Fryer is essential for safe and efficient operation․ The unit includes the fryer pot itself‚ constructed from durable stainless steel‚ designed to hold the oil and turkey․ A robust lifting hook facilitates safe lowering and raising of the bird․
You’ll also find a thermometer for precise oil temperature monitoring‚ and a control panel for adjusting heat settings․ The power cord‚ featuring a short length for safety‚ connects to a grounded electrical outlet․
Additionally‚ the fryer may include a basket for steaming or boiling‚ and a lid for covering the pot during operation․ Carefully inspect all parts before each use‚ ensuring they are clean and in good working order․ Refer to the detailed parts diagram in this manual for visual identification․
Assembly Instructions: Step-by-Step
Proper assembly is crucial for the safe and effective use of your Masterbuilt Turkey Fryer․ Begin by carefully unpacking all components and verifying that all parts are present‚ referencing the parts list․ Attach the legs to the fryer pot‚ ensuring they are securely fastened – typically‚ they simply screw into designated slots․
Next‚ connect the control panel to the fryer pot‚ aligning the connectors and tightening any screws․ Ensure the thermometer is correctly inserted into its designated port‚ allowing for accurate temperature readings․
Finally‚ attach the lifting hook to the fryer pot‚ verifying its secure connection․ If assistance is needed‚ don’t hesitate to contact Masterbuilt Customer Service at 1-800-489-1581․ Double-check all connections before proceeding․
Preparing for Your First Fry
Before your inaugural fry‚ meticulous preparation is paramount for safety and optimal results․ Select a spacious‚ outdoor location‚ far from structures and flammable materials․ Ensure the ground is level and stable to prevent tipping․ Have a fire extinguisher rated for grease fires readily accessible – this is non-negotiable․
Verify the fryer is unplugged during setup․ Place a drip pan beneath the unit to catch any potential oil splatters․ Gather all necessary tools: thermometer‚ lifting hook‚ oven mitts‚ and a timer․
Most importantly‚ never operate the fryer indoors or in an enclosed space․ A short power cord is provided to minimize tripping hazards‚ so extension cords are discouraged․
Choosing the Right Turkey Size (Maximum 20lbs)
Selecting the appropriate turkey size is crucial for safe and effective frying․ The Masterbuilt Turkey Fryer has a strict maximum capacity of 20lbs (9․07kgs)․ Exceeding this limit poses significant safety risks‚ including oil overflow and potential burns․
A smaller turkey will cook more evenly and quickly‚ while a larger bird may not cook thoroughly‚ even with extended frying times․ Prioritize safety over a larger meal; it’s better to fry two smaller turkeys than risk an accident with one oversized bird․
Always weigh your turkey before beginning the process․ Do not estimate! Accurate weight measurement is essential for calculating the correct oil volume and frying duration․
Thawing the Turkey: A Critical Step
Complete thawing is absolutely essential before frying a turkey․ A partially frozen turkey will react violently when introduced to hot oil‚ creating a dangerous and potentially explosive situation․ Never attempt to fry a frozen or even partially frozen bird!
The safest thawing method is refrigeration․ Allow approximately 24 hours of thawing time for every 4-5 pounds of turkey weight․ Ensure the turkey remains in its original packaging and is placed on a tray to catch any drips․
Verify complete thawing by checking the internal temperature in several places․ It should be consistently above 40°F (4°C)․ A fully thawed turkey will have no ice crystals remaining in the cavity․
Brining and Seasoning Your Turkey
Brining significantly enhances the flavor and moisture of your fried turkey․ A brine solution typically consists of water‚ salt‚ and sugar‚ with optional additions like herbs‚ spices‚ and citrus․ Submerge the thawed turkey completely in the brine for 12-24 hours in a food-safe container‚ keeping it refrigerated․
After brining‚ thoroughly rinse the turkey inside and out with cold water and pat it completely dry․ This removes excess salt and ensures crispy skin․
Season generously with your favorite dry rub or spice blend․ Consider using a blend designed for poultry‚ or create your own with paprika‚ garlic powder‚ onion powder‚ and black pepper․ Ensure seasoning penetrates both under and over the skin․
Oil Selection and Quantity
Choosing the right oil is crucial for safe and flavorful frying․ Peanut oil is the preferred choice due to its high smoke point and neutral flavor‚ but canola‚ vegetable‚ or soybean oil can also be used․ Avoid olive oil‚ as it has a low smoke point and will break down at frying temperatures․

Determining the correct oil quantity is paramount to prevent overflow and ensure complete turkey submersion․ A critical step involves a water displacement test: place the turkey in the fryer basket and fill with water until it covers the bird by at least one inch․
Remove the turkey and carefully mark the water level․ This mark indicates the amount of oil needed – never exceed this level․
Recommended Oil Types for Turkey Frying
Selecting the appropriate oil is vital for both safety and achieving optimal frying results․ Peanut oil consistently ranks as the top recommendation due to its exceptionally high smoke point – around 450°F (232°C) – minimizing the risk of oil breakdown and ensuring a stable frying temperature․
However‚ if allergies are a concern‚ high-quality canola oil presents a suitable alternative‚ boasting a smoke point of approximately 400°F (204°C)․ Vegetable and soybean oils are also acceptable‚ though they may impart a slight flavor to the turkey․
Crucially‚ avoid using olive oil or sesame oil‚ as their lower smoke points make them unsuitable and potentially dangerous for deep-frying applications․
Calculating the Correct Oil Level
Determining the precise oil level is paramount for a safe and successful turkey fry․ A common method involves placing the thawed turkey into the fryer basket and lowering it into the empty pot․ Add water until the turkey is fully submerged‚ noting the water level․
Carefully remove the turkey and completely dry the pot․ The water level previously reached indicates the required oil level․ Never exceed this level‚ as it can cause dangerous oil overflow when the turkey is introduced to the hot oil․
Always double-check your calculations and err on the side of caution․ Accurate oil measurement prevents hazardous situations and ensures even cooking․
Heating the Oil: Monitoring Temperature
Precise temperature control is crucial during the heating process; Begin by carefully monitoring the oil temperature with a reliable thermometer – ideally one designed for deep frying․ Aim for a consistent temperature of 350°F (177°C) before introducing the turkey․
Heating typically takes 30-45 minutes‚ depending on ambient temperature and oil volume․ Never leave the fryer unattended during this phase․ Maintain a safe distance and be prepared for potential splattering․
Consistent monitoring prevents overheating‚ which can lead to oil degradation and a fire hazard․ A stable temperature ensures the turkey cooks evenly and remains juicy․
Frying Process: A Detailed Walkthrough
With the oil at 350°F (177°C)‚ the frying process begins cautiously․ Wearing appropriate safety gear – including oven mitts and eye protection – is paramount․ Slowly and steadily lower the completely thawed and dry turkey into the hot oil using the provided lifting hook․
Lowering too quickly can cause dangerous splattering; Once submerged‚ immediately release the hook and step back․ Maintain the oil temperature‚ adjusting the burner as needed․ Avoid fluctuations; consistency is key for even cooking․
The entire frying process requires diligent supervision․ Never leave the fryer unattended during this critical stage‚ ensuring a safe and delicious outcome․
Lowering the Turkey into the Hot Oil

Exercise extreme caution when lowering the turkey into the 350°F (177°C) oil․ Utilizing the turkey lifting hook is essential for safety‚ preventing direct contact with the hot oil․ Ensure the turkey is completely thawed and thoroughly dried to minimize splattering and potential hazards․
Slowly and steadily descend the turkey into the oil‚ maintaining a controlled pace․ Avoid dropping or rushing the process‚ as this can cause a dangerous boil-over․ Once fully submerged‚ carefully release the lifting hook‚ immediately stepping back to a safe distance․
Constant vigilance is crucial during this step; never leave the fryer unattended․ A smooth‚ controlled descent is paramount for a safe and successful fry․
Maintaining Optimal Frying Temperature
Consistent temperature control is vital for a perfectly cooked and safely fried turkey․ Aim to maintain the oil temperature at a steady 350°F (177°C) throughout the entire frying process․ Fluctuations can lead to uneven cooking or‚ in severe cases‚ a dangerous situation․
Monitor the oil temperature frequently using the built-in thermometer‚ adjusting the burner as needed․ Be prepared for a temporary temperature drop when the turkey is initially submerged; compensate by slightly increasing the heat․
Avoid drastic adjustments to the burner; small‚ incremental changes are best․ Consistent monitoring and minor adjustments will ensure a golden-brown‚ juicy turkey․
Frying Time Calculation (Based on Weight)
Accurate frying time is crucial for a safely cooked turkey․ A general rule of thumb is to calculate 3-4 minutes of frying time per pound of turkey․ However‚ this is an estimate‚ and several factors can influence the final cooking time․
For a turkey weighing 12 pounds‚ expect a frying time of approximately 36-48 minutes․ Always use a meat thermometer to verify the internal temperature reaches 165°F (74°C) in the thickest part of the thigh․
Remember‚ these times are guidelines; always prioritize internal temperature over estimated frying duration․ Consistent monitoring ensures a delicious and safe result․

Post-Frying Procedures
Once the turkey reaches an internal temperature of 165°F (74°C)‚ carefully begin the removal process․ Turn off the fryer and allow it to begin cooling‚ but do not attempt to move it immediately․
Using heavy-duty hooks or a turkey lifter‚ slowly and steadily lift the turkey from the hot oil․ Avoid sudden movements to prevent splashing․ Place the turkey on a large‚ heat-resistant surface lined with paper towels to drain excess oil․
Let the turkey rest for at least 20-30 minutes before carving․ This allows the juices to redistribute‚ resulting in a more tender and flavorful bird․ Remember safety first – hot oil and surfaces require extreme caution!
Safely Removing the Turkey from the Fryer
After the calculated frying time‚ and confirming an internal temperature of 165°F (74°C)‚ power off the Masterbuilt fryer․ Allow a brief settling period before attempting removal – this minimizes oil disturbance․
Employing heavy-duty‚ long-handled hooks or a dedicated turkey lifter is crucial․ Slowly and deliberately lift the turkey‚ maintaining a stable grip and avoiding jerky motions that could cause dangerous splashing of hot oil․
Carefully transfer the cooked turkey to a large‚ sturdy‚ heat-resistant surface prepared with ample paper towels or a draining rack․ Exercise extreme caution throughout the entire process; hot oil presents a significant burn risk․
Oil Cooling and Disposal
Allow the oil to cool completely – this is paramount for safety! A minimum of several hours‚ ideally overnight‚ is recommended before any handling․ Never attempt to move or drain hot oil; severe burns can result․
Once cooled‚ carefully strain the oil through a fine-mesh sieve lined with cheesecloth to remove any food particles․ This extends the oil’s potential for reuse (if appropriate for your chosen oil type)․
Dispose of used oil responsibly․ Do not pour it down the drain! Seal it in a leak-proof container and contact your local waste management facility for proper disposal guidelines․ Recycling options may be available in your area․
Cleaning and Maintenance

Always unplug the fryer and allow it to cool completely before cleaning․ Remove the pot‚ lifting hook‚ and any other detachable parts․ Wash these components with warm‚ soapy water; avoid abrasive cleaners that could damage the surfaces․
The exterior of the fryer can be wiped down with a damp cloth․ Ensure no water enters the electrical components․ Inspect the power cord regularly for any signs of damage and replace if necessary․
Proper maintenance extends the life of your Masterbuilt fryer․ Store the unit in a clean‚ dry location when not in use․ Regular cleaning prevents buildup and ensures optimal performance for years to come․
Troubleshooting Common Issues
Fryer Not Heating Up: First‚ ensure the unit is properly plugged in and the power outlet is functioning․ Check the temperature control dial is set correctly․ If issues persist‚ contact Masterbuilt Customer Support at 1-800-489-1581․
Oil Temperature Fluctuations: External temperature changes or a large‚ cold turkey can cause fluctuations․ Maintain a consistent temperature by adjusting the control dial and ensuring proper insulation․ Avoid outdoor use in windy conditions․
Turkey Not Cooking Evenly: Ensure the turkey is fully thawed and brined․ Maintain the correct oil level and frying temperature throughout the process․ Use a meat thermometer to verify internal temperature reaches 165°F (74°C)․
Fryer Not Heating Up
Initial Checks: Before assuming a malfunction‚ verify the power cord is securely plugged into a functioning electrical outlet․ Test the outlet with another appliance to confirm it’s providing power․ Inspect the power cord itself for any visible damage or fraying․
Control Panel & Safety Features: Ensure the temperature control dial is set to the desired frying temperature and isn’t accidentally turned off․ Some models have safety shut-off features; confirm these aren’t activated․
Seeking Assistance: If the fryer still fails to heat‚ do not attempt self-repair․ Contact Masterbuilt Customer Service immediately at 1-800-489-1581 for expert guidance and potential warranty support․
Oil Temperature Fluctuations
Understanding Temperature Swings: Minor temperature fluctuations during frying are normal‚ especially when introducing a cold turkey․ However‚ significant or rapid swings indicate a potential issue․
External Factors: Cold weather or a windy environment can impact oil temperature․ Shielding the fryer from the elements can help stabilize it․ Ensure the fryer is placed on a level surface to ensure even heat distribution․
Oil Volume & Turkey Size: An insufficient oil volume or an excessively large turkey can cause dramatic temperature drops․ Always calculate the correct oil level and adhere to the 20lb maximum turkey weight․ If fluctuations persist‚ contact Masterbuilt support at 1-800-489-1581․
Turkey Not Cooking Evenly
Addressing Uneven Cooking: If your turkey exhibits uneven cooking – darker in some areas than others – several factors could be at play․ Ensuring the turkey is fully thawed is paramount; ice crystals impede even heat penetration․
Oil Circulation & Temperature: Insufficient oil circulation or inconsistent temperature can lead to uneven results․ Verify the oil level is correct and the heating element functions properly․ Avoid overcrowding the fryer‚ as this restricts oil flow․
Turkey Positioning: Gently rotate the turkey during the frying process to promote even browning and cooking․ For assistance or concerns‚ contact Masterbuilt Customer Service at 1-800-489-1581 for expert guidance․
Masterbuilt Customer Support Information
Need Assistance? We’re Here to Help! Masterbuilt is dedicated to providing exceptional customer support for all your cooking needs; For assembly assistance‚ missing or damaged parts‚ or general inquiries regarding your turkey fryer‚ please don’t hesitate to reach out․
Contact Information: Our dedicated customer service team is available at 1-800-489-1581․ We are committed to resolving your issues promptly and efficiently; You can also visit the Masterbuilt website for frequently asked questions‚ helpful tips‚ and additional resources․
Online Resources: Explore ManualsLib for downloadable operation manuals and safety instructions․ Masterbuilt strives to ensure a seamless and enjoyable cooking experience for every customer․
Warranty Details and Registration
Protect Your Investment with Masterbuilt’s Warranty! Masterbuilt stands behind the quality of its products‚ including your turkey fryer․ To ensure peace of mind‚ please familiarize yourself with the warranty details included with your purchase․
Warranty Coverage: The warranty covers defects in materials and workmanship under normal household use․ Specific terms and duration vary depending on the model; refer to your product documentation for complete details․
Registration is Key: Registering your turkey fryer is crucial for efficient warranty service and product updates․ Visit the Masterbuilt website to register your product quickly and easily․ This allows us to contact you with important safety information and exclusive offers!
Finding Replacement Parts
Keep Your Fryer Running Smoothly! Over time‚ certain components of your Masterbuilt Turkey Fryer may require replacement to maintain optimal performance and safety․ Fortunately‚ obtaining replacement parts is a straightforward process․
Masterbuilt’s Online Store: The quickest and most convenient way to find replacement parts is through the official Masterbuilt website․ You can browse a comprehensive catalog of parts‚ including heating elements‚ thermostats‚ baskets‚ and more․
Customer Service Assistance: If you need help identifying the correct part for your model‚ don’t hesitate to contact Masterbuilt Customer Service at 1-800-489-1581․ Their knowledgeable representatives will guide you through the process․
Assembly Assistance Contact (1-800-489-1581)
Need a Helping Hand? We understand that assembling your new Masterbuilt Turkey Fryer can sometimes be challenging․ Don’t worry – expert assistance is readily available to ensure a smooth and stress-free setup process!
Dedicated Support Line: Masterbuilt provides a dedicated customer service line specifically for assembly assistance․ Simply dial 1-800-489-1581 to connect with a knowledgeable representative who can walk you through each step of the assembly process․
Troubleshooting & Guidance: Our team can help you identify any missing or damaged parts‚ clarify instructions‚ and troubleshoot any issues you may encounter during assembly․ We are committed to getting your fryer up and running quickly!

Exploring Additional Cooking Options
Beyond the Turkey: Your Masterbuilt Fryer isn’t limited to just Thanksgiving! Unlock its full potential with versatile cooking options beyond a perfectly fried turkey․ This appliance truly shines as a multi-functional kitchen workhorse․

Steaming Capabilities: Utilize the fryer for healthy and delicious steaming․ Vegetables‚ seafood‚ and even dumplings can be steamed to perfection‚ retaining their nutrients and flavors․ It’s a fantastic alternative to traditional steaming methods․
Boiling Functionality: From crab boils to pasta‚ the fryer’s large capacity makes it ideal for boiling substantial quantities of food․ Enjoy convenient and efficient boiling for large gatherings or meal prepping․
Flavor Infusion: Experiment with wood chips or pellets – Jack Daniel’s pellets offer a delightful aroma – to enhance your dishes with smoky flavors!
Using the Fryer for Steaming
Healthy and Flavorful Steaming: Transform your Masterbuilt Fryer into a powerful steamer‚ offering a healthier alternative to frying․ Steaming preserves vital nutrients and natural flavors‚ resulting in incredibly delicious and wholesome meals․
Setup for Steaming: To steam‚ add water to the fryer pot‚ ensuring it doesn’t reach the steaming basket․ Utilize a steaming basket or rack to elevate your food above the boiling water․ This prevents direct contact and ensures even cooking․
Food Options: Steam a wide variety of foods‚ including fresh or frozen vegetables‚ seafood like shrimp and crab‚ and even delicate dumplings․ Adjust steaming times based on the food type and desired tenderness․
Temperature Control: Maintain a consistent temperature for optimal steaming․ Monitor the water level and replenish as needed to prevent the pot from drying out․
Boiling with Your Masterbuilt Fryer
Versatile Boiling Capabilities: Your Masterbuilt Fryer isn’t limited to frying; it excels at boiling too! This function is perfect for preparing large quantities of food quickly and efficiently‚ expanding your culinary possibilities beyond the holiday season․
Water Level and Food Placement: Fill the fryer pot with sufficient water to fully submerge the food you intend to boil․ Ensure adequate space between the water level and the maximum fill line for safety․ Carefully lower food into the boiling water․
Ideal for: Boil potatoes‚ corn on the cob‚ pasta‚ lobster‚ or even large batches of eggs․ Adjust boiling times according to the specific food and desired level of doneness․
Temperature Management: Maintain a rolling boil for consistent cooking․ Monitor the water temperature and adjust the heat as needed to prevent boil-overs․
Flavor Enhancement: Wood Chips and Pellets

Elevate Your Flavor Profile: Enhance the taste of your fried or boiled creations with wood chips or pellets! Masterbuilt fryers allow for subtle smoke infusion‚ adding depth and complexity to your dishes․
Wood Chip/Pellet Usage: Place wood chips or pellets into the smoker tray‚ ensuring they don’t obstruct heating elements․ Jack Daniel’s pellets offer a fantastic aroma‚ though flavor impact varies․ Consider using a foil pouch to prolong burn time․
Wood Variety: Experiment with different wood types – cherry‚ maple‚ apple‚ orange‚ oak‚ and hickory – to discover your preferred flavor combinations․ Each wood imparts a unique character․
Subtle Smoke Infusion: Remember‚ the goal is a subtle smoke flavor‚ not overpowering smokiness․ Adjust the amount of wood used to achieve your desired result․
Comments