Honeywell Timer Switch Manual: A Comprehensive Guide
This guide details Honeywell timer switches‚ offering programming‚ troubleshooting‚ and installation insights for models like RPLS540A‚ RPLS730B‚ and ECONOSwitch‚ enhancing home automation.
Honeywell timer switches are designed to bring convenience and energy savings to your home lighting and appliance control. These devices automate on/off functions‚ eliminating the need for manual operation and reducing energy consumption. Popular models‚ such as the RPLS540A‚ RPLS541A‚ and RPLS730B‚ alongside the ECONOSwitch series‚ offer 7-day programmable schedules.
They are ideal for porch lights‚ indoor lamps‚ and small motors. Some‚ like the Aube solar timer‚ even handle daylight saving time automatically. Understanding these switches empowers users to optimize their home automation systems and enjoy a more comfortable‚ efficient lifestyle.
Types of Honeywell Timer Switches
Honeywell offers a diverse range of timer switches to suit various needs. The RPLS540A/RPLS541A models are popular choices for basic 7-day programming of lights and appliances. The RPLS730B model provides similar functionality with potentially enhanced features.
For broader control‚ the ECONOSwitch 7-Day Programmable Timers are designed for both lighting and motors‚ offering versatile scheduling options. Additionally‚ specialized models like the Aube solar timer provide automatic operation based on sunrise and sunset‚ simplifying automation and minimizing manual adjustments.
RPLS540A/RPLS541A Models
The RPLS540A and RPLS541A are foundational Honeywell timer switches‚ ideal for automating lighting and small appliances. These models feature straightforward 7-day programming‚ allowing users to set distinct on/off schedules for each day of the week. They are designed for compatibility with standard incandescent and halogen lights‚ offering energy-saving potential through automated control.

These switches are known for their reliability and ease of use‚ making them a popular choice for basic home automation needs. They provide a cost-effective solution for scheduled lighting and appliance operation.
RPLS730B Model
The RPLS730B represents an advancement in Honeywell’s timer switch line‚ offering enhanced features alongside the core functionality of 7-day programming. This model provides greater flexibility in scheduling‚ allowing for multiple on/off events per day. Like the RPLS540A/541A‚ it maintains compatibility with incandescent and halogen lighting‚ contributing to energy conservation through automated control.
The RPLS730B is often favored for applications requiring more granular control over lighting or appliance schedules‚ offering a balance of features and user-friendliness.
ECONOSwitch 7-Day Programmable Timers
Honeywell’s ECONOSwitch series provides a cost-effective solution for automating lighting and motors within a home or small business. These 7-day programmable timers offer a robust set of features‚ including multiple on/off settings daily‚ designed to maximize energy savings and convenience. They are particularly well-suited for controlling outdoor lighting‚ fans‚ or small appliances.

The ECONOSwitch line emphasizes ease of use‚ making it accessible for both novice and experienced users seeking reliable automated control.
Safety Precautions & Electrical Considerations
Prioritize safety when installing and using Honeywell timer switches. Always disconnect power at the breaker before commencing any electrical work. It is best to consult a qualified electrician for installations‚ especially if you are unfamiliar with electrical wiring. Ensure the timer switch is compatible with the intended load (incandescent‚ halogen‚ or LED).
Never exceed the switch’s voltage or wattage ratings. Improper wiring can create a fire hazard or damage the device. Follow all local electrical codes and regulations.
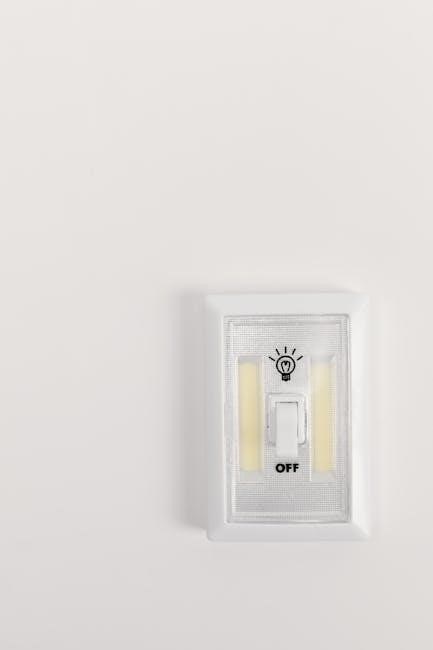
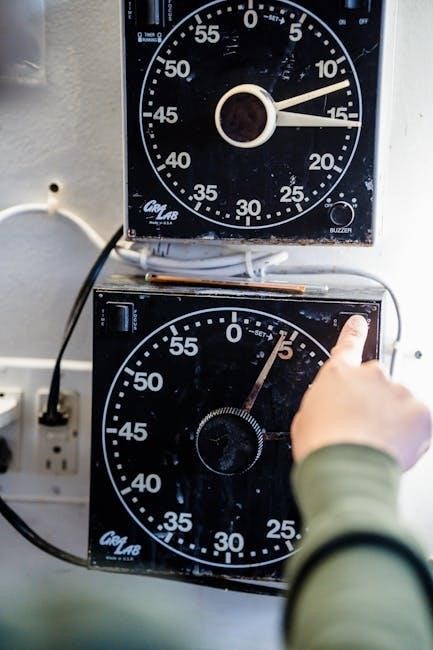
Understanding the Timer Switch Display
Honeywell timer switch displays vary by model‚ but generally feature a screen showing the current time‚ day of the week‚ and programmed on/off schedules. Display icons indicate active programs‚ override status‚ and daylight saving time settings. Familiarize yourself with these icons for quick status checks.
Navigating the menu system typically involves buttons for setting time‚ date‚ and programming schedules. Refer to your specific model’s manual for detailed instructions on accessing and utilizing all display features.
Display Icons and Their Meanings
Honeywell timer switch displays utilize icons to convey crucial information at a glance. A clock icon typically represents the current time‚ while a sun/moon icon signifies on/off schedules. A flashing icon often indicates an active program or override. Other common icons denote daylight saving time activation‚ manual mode‚ and potential errors.
Consult your specific model’s manual for a comprehensive list and detailed explanation of each icon. Understanding these visual cues simplifies operation and troubleshooting‚ allowing for efficient control of your lighting and appliances.
Navigating the Menu System
Honeywell timer switches feature a menu system accessed via dedicated buttons – often labeled “Mode‚” “Set‚” or “Program.” Pressing these buttons cycles through options like time/date setting‚ on/off schedule creation‚ and override functions. Use the up/down arrow buttons to select desired values or menu items.
Confirm selections with the “Set” or “Enter” button. The display will guide you through each step. Refer to your model’s manual for specific button layouts and menu structures‚ as they can vary. Practice navigating to become familiar with the process.
Programming a Honeywell Timer Switch
Programming a Honeywell timer switch allows automated control of lights and appliances. Begin by accessing the programming mode using the timer’s buttons. You’ll typically set the current time and date as a starting point. Then‚ define on/off schedules for each day of the week‚ specifying the exact times for operation.
Many models support different schedules for weekdays and weekends. Utilize the override function for temporary adjustments without altering the programmed schedule. Consult your specific model’s manual for detailed‚ step-by-step instructions.
Setting the Current Time and Date

Accurate time and date settings are crucial for proper timer switch operation. Typically‚ you’ll enter programming mode by pressing a “Set” or “Program” button. Use the arrow buttons to navigate to the hour setting‚ then press “Set” again to confirm. Repeat this process for minutes‚ month‚ day‚ and year.
Ensure you select the correct AM/PM designation. Some models may automatically adjust for daylight saving time‚ while others require manual adjustment. Verify the displayed time against a reliable time source after setting.
Creating On/Off Schedules (7-Day Programming)
Honeywell timer switches offer 7-day programming‚ allowing customized schedules for each day of the week. Access the programming mode and select the day you wish to configure. Then‚ set the first “On” time using the arrow buttons and confirm with “Set.” Next‚ set the “Off” time‚ repeating the process.
You can program multiple on/off cycles per day. Repeat these steps for each day‚ or use the “Copy to” function to apply a schedule to multiple days simultaneously‚ streamlining the setup process.
Using the Override Function
The override function temporarily bypasses the programmed schedule‚ allowing manual control without permanently altering settings. Typically‚ a dedicated “Override” button activates this feature‚ turning the connected device on or off immediately. This is useful for unexpected needs or events.
Override durations vary by model; some offer temporary overrides lasting until the next scheduled event‚ while others allow setting a specific override duration. Remember to deactivate the override to resume normal programmed operation‚ ensuring consistent automation.
Troubleshooting Common Issues
Encountering problems with your Honeywell timer switch? Common issues include the timer failing to turn devices on/off as scheduled‚ displaying an incorrect time‚ or presenting difficulties during programming. First‚ verify the wiring connections and power supply. Ensure the correct time and date are set‚ and double-check the programmed on/off schedules.
If problems persist‚ consult the specific model’s manual for detailed troubleshooting steps. Resetting to factory defaults can often resolve complex issues‚ but remember this will erase all custom settings.
Timer Not Turning On/Off
If your Honeywell timer isn’t activating‚ begin by confirming the power supply to both the timer and the connected load. Inspect wiring connections for looseness or corrosion – a secure connection is crucial. Verify the programmed schedule aligns with the desired on/off times and that the override function isn’t active.
Also‚ check if the timer’s display indicates any error codes. A faulty bulb or appliance can also prevent operation‚ so test the load independently. If issues continue‚ consult the manual for model-specific diagnostics.
Incorrect Time Display
An inaccurate time display on your Honeywell timer necessitates resetting the current time and date. Access the timer’s menu system – typically involving a ‘Set’ or ‘Program’ button – and navigate to the time setting. Ensure the correct time zone is selected‚ and double-check AM/PM designations.
If the problem persists‚ the timer’s internal battery might be depleted‚ especially after a power outage. Replacing the battery (refer to the manual for type and location) should restore accurate timekeeping. Confirm Daylight Saving Time settings are correct.
Difficulty Programming
Encountering programming challenges with your Honeywell timer? First‚ consult the specific model’s manual for detailed‚ step-by-step instructions. Ensure you’re navigating the menu system correctly‚ using the ‘Set‚’ ‘Program‚’ or arrow buttons as indicated.
If still struggling‚ try resetting the timer to factory defaults (see manual) and starting the programming process anew. Double-check each on/off schedule entry for accuracy. Remember‚ some models have limited programming slots; ensure you haven’t exceeded them.
Wiring Diagrams & Installation
Proper installation is crucial for safe and effective operation. Always disconnect power at the breaker before beginning any wiring. Honeywell timer switches typically utilize standard wiring configurations – line‚ load‚ and neutral. Refer to the diagram specific to your model (found in the manual) for correct connections.
Ensure compatibility with your lighting – these timers generally work well with incandescent and halogen lights. If unsure‚ consult a qualified electrician. Incorrect wiring can damage the timer or create a safety hazard. Double-check all connections before restoring power.
Standard Wiring Configurations
Honeywell timer switches commonly employ three primary wiring connections: Line (hot)‚ Load (to the light fixture)‚ and Neutral. The Line wire brings power to the timer‚ while the Load wire sends power from the timer to the device being controlled. The Neutral wire completes the circuit.
Wiring color codes vary‚ but typically black is Line‚ white is Neutral‚ and another color (often red or blue) is Load. Always verify with a non-contact voltage tester before making connections. Incorrect wiring can cause malfunction or pose a safety risk; consult a professional if needed.
Compatibility with Incandescent/Halogen Lights
Honeywell timer switches‚ particularly models like RPLS540A and RPLS730B‚ are generally compatible with standard incandescent and halogen lighting. However‚ it’s crucial to check the wattage rating of both the timer switch and the connected lights. Exceeding the timer’s maximum wattage can lead to overheating and potential failure.
LED compatibility may vary; some older models may not function optimally with LEDs due to their lower wattage draw. Newer Honeywell timers are often designed to work with a wider range of bulb types‚ including LEDs. Always consult the specific model’s manual for detailed compatibility information.
Energy Saving Features & Benefits
Honeywell timer switches offer significant energy savings by automating lighting control. Scheduled on/off times eliminate wasted electricity from lights left on unnecessarily. Programming lights to operate only when needed reduces energy consumption and lowers electricity bills. The 7-day programmable functionality allows for customized schedules tailored to your lifestyle.
Features like automatic daylight saving time adjustment further contribute to energy efficiency. By reducing energy waste‚ these timers promote a more sustainable and cost-effective home environment‚ offering both financial and environmental benefits.
Daylight Saving Time Adjustment
Honeywell timer switches handle Daylight Saving Time (DST) in two ways: automatically or manually. Some models‚ like the Aube solar timer‚ adjust automatically‚ seamlessly shifting the schedule forward in spring and back in fall without user intervention. This is a convenient‚ hands-free option.
Other models require manual adjustment; Users must update the time settings twice yearly to reflect DST changes. Refer to your specific model’s manual for instructions on how to perform this adjustment. Accurate DST settings ensure your schedules remain synchronized with the correct time.
Automatic vs. Manual Adjustment
Automatic DST adjustment is a significant convenience feature found in certain Honeywell timer switch models‚ notably the Aube solar timer. These devices detect the time change and update schedules accordingly‚ eliminating the need for user intervention. This “set it and forget it” functionality is ideal for those seeking hassle-free operation.
Manual adjustment requires the user to actively change the time on the timer switch twice a year. While requiring more effort‚ it offers greater control and is suitable for areas with unique DST rules or for users who prefer direct management of their schedules. Consult your model’s manual for specific instructions.
Resetting the Timer Switch to Factory Defaults
Resetting a Honeywell timer switch to its factory defaults clears all programmed schedules and settings‚ returning it to its original‚ out-of-the-box state. This is useful for troubleshooting persistent issues or preparing the device for a new installation. The exact procedure varies by model; however‚ it generally involves holding a specific button combination for a set duration.
Consult your specific model’s manual for detailed instructions‚ as incorrect resetting attempts could potentially cause unexpected behavior. Be aware that resetting will erase all customized settings‚ requiring you to reprogram the timer switch from scratch.
Technical Specifications (Voltage‚ Wattage‚ etc.)
Honeywell timer switches are designed to operate within specific electrical parameters. Typically‚ these devices support a voltage range of 120V AC‚ 60Hz. Wattage capacity varies by model‚ but commonly ranges from 300W to 1800W for incandescent loads‚ and lower for LED or CFL bulbs.
Always verify the wattage of your connected lights doesn’t exceed the timer switch’s maximum rating to prevent damage or fire hazards. Refer to the product’s documentation for precise specifications‚ including amperage limits and compatible bulb types.
Where to Find Official Honeywell Manuals
Accessing official Honeywell manuals is crucial for safe and effective timer switch operation. The primary source is the Honeywell Home website (honeywellhome.com)‚ where you can search by model number (e.g.‚ RPLS540A‚ RPLS730B).
Alternatively‚ many retailers like Home Depot and Lowe’s offer downloadable manuals on their websites for products they sell. Direct links are often available through Google searches specifying the model and “manual PDF.” Ensure you download from reputable sources to avoid outdated or incorrect information.
Frequently Asked Questions (FAQ)

Q: My timer isn’t turning on/off. A: Check wiring connections‚ ensure the correct program is active‚ and verify the time/date are set accurately. Q: How do I handle Daylight Saving Time? A: Some models adjust automatically; others require manual changes. Consult your specific model’s manual.
Q: Can I use these with LED bulbs? A: Generally‚ yes‚ but check wattage compatibility. Q: How do I reset to factory settings? A: Refer to the manual for the specific reset procedure for your model.
Comments